Over time dust will build up on the mirrors of a reflector telescope and the amount will depend on the conditions where you live and how you store your telescope. Dust can be minimised by keeping the aperture capped when not in use and storing the OTA with the primary mirror facing down. Dust will reduce reflectivity and increase light scatter. Combined with pollutants, it can damage the surface of the mirror. After reading a number of forums and other sources (1, 2), I have concluded that an insubstantial amount of dust and dirt on the primary mirror will not affect views. On average, users owners clean their mirrors every one to two years. A few owners clean their mirrors twice or three times a year and some carry out the procedure every five to ten years.
Equipment
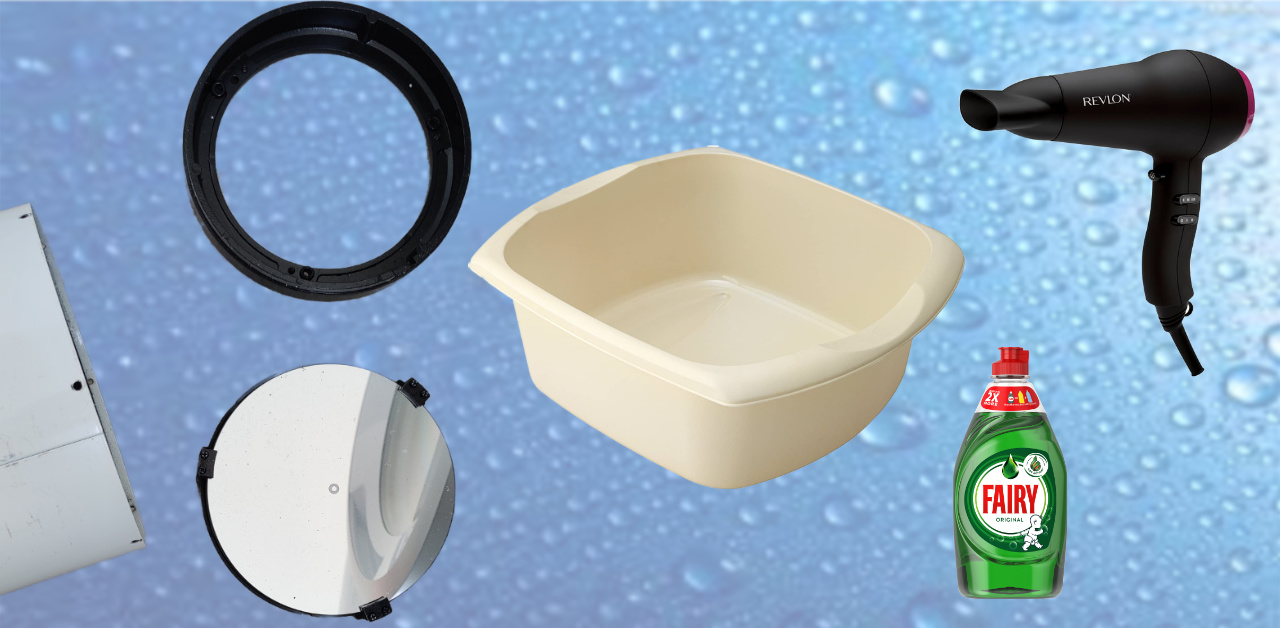
Box to hold screws and rubber rings, small (clean) plastic bowl, a sheet of white paper, thin card, distilled or deionised water, screwdriver, clean towel, hairdryer.
Carry out the process in an environment where does will not settle, so avoid indoors. Moving air will help.
Removal Procedure
Remove the finder, Telrad and holders.
Remove the OTA from the base.
Primary Mirror
With the OTA horizontal, remove the six screws securing the primary mirror and bracket.
Use tape to mark the position of the bracket/mirror on the OTA.

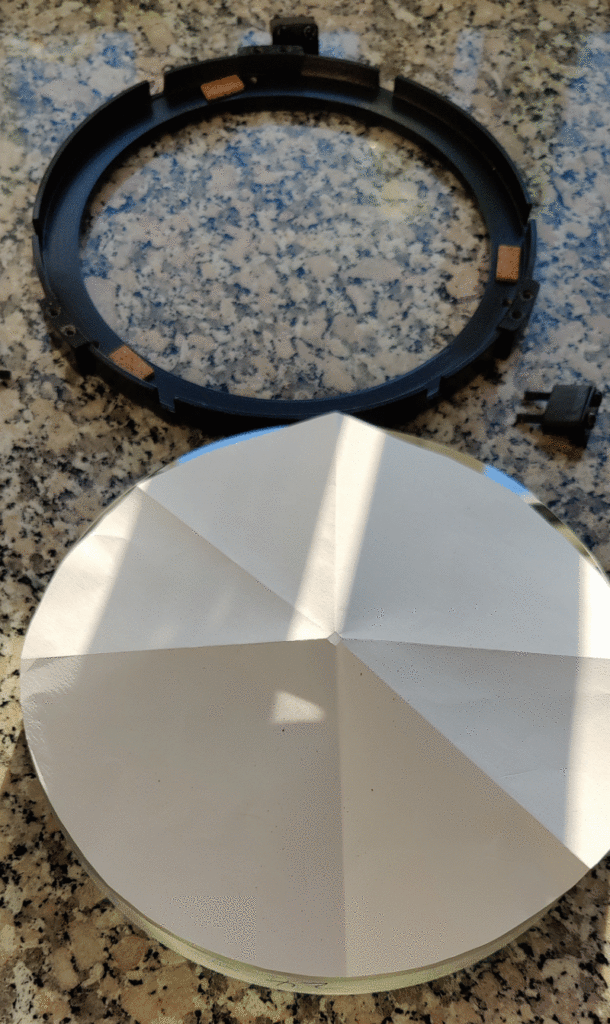
Use the thin blade of a screwdriver to gently prise the cover from the OTA. Work around the tube gradually in order to open a gap using larger screwdriver blades as required. Hold the mirror mount and carefully lift off the heavy mount/mirror assembly.
Do not loosen or remove the primary tilt screws and locking bolts as this will cause the mirror to fall.
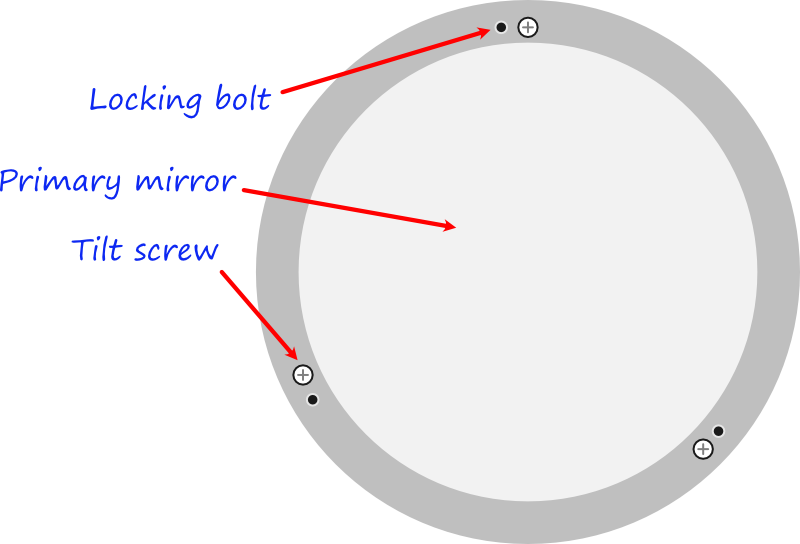
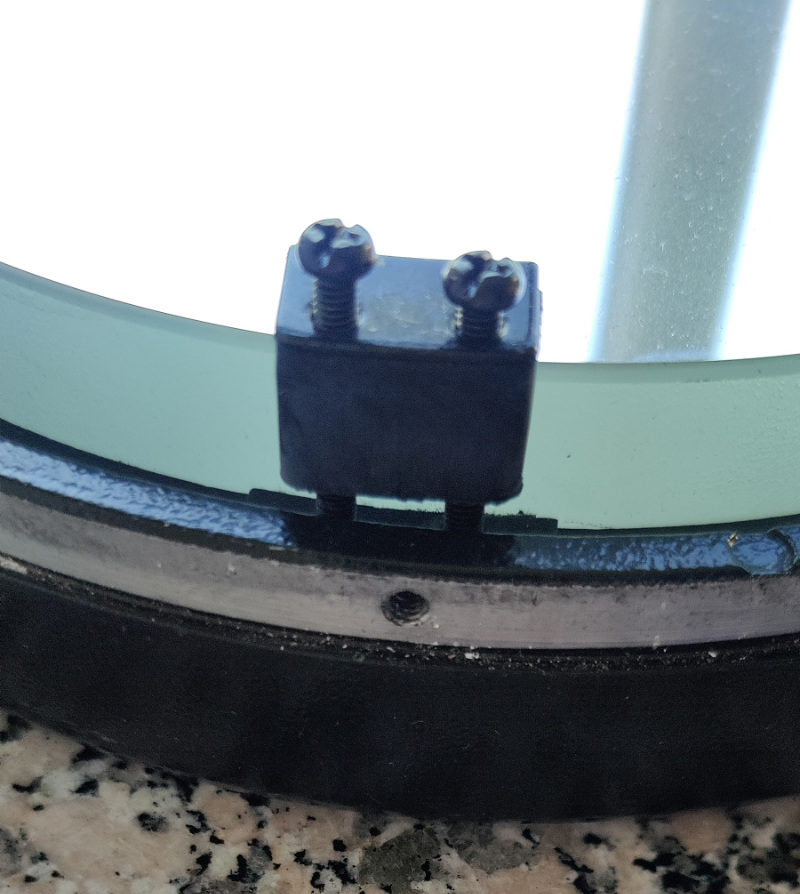
Place the mirror facing up on a clean flat surface. Remove the two screws and clamps from each of the three clips and keep them safe.
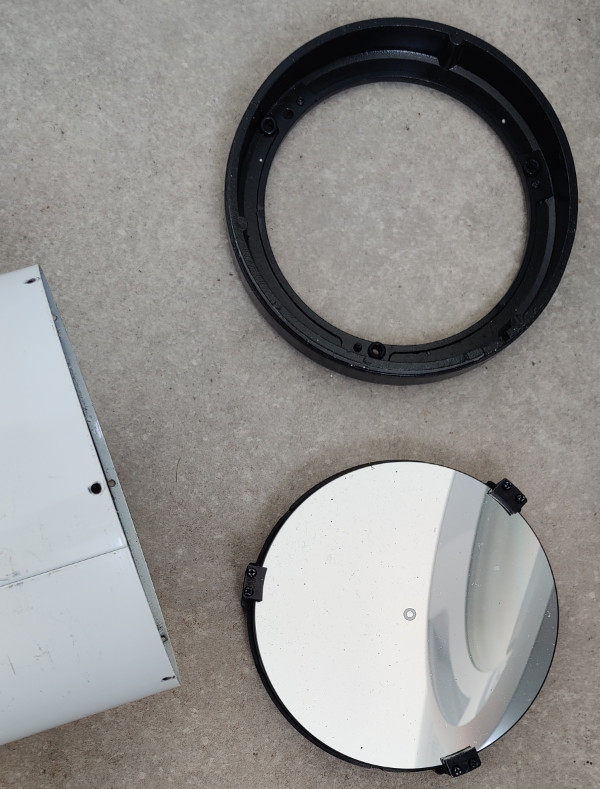
With your hand supporting the underside of the mirror, lift it out of the mount from the plastic surround and place it in the plastic bowl, facing up. The image below shows the mount and plastic assembly fully disassembled but for cleaning there is no need to separate the metal surround and plastic frame.
This is a good time to confirm that the centre mark is actually centred! With the mirror on the sheet of paper, draw around the circumference using a pencil. Cut out the circle and fold it in half and half again. Use scissors to cut a small hole across the centre of the paper. Open it up and confirm that the centre mark is where it should be.
Secondary Mirror and Spider
If the secondary mirror needs cleaning, with the OTA vertical, remove the six screws securing the cover that surrounds the aperture. Lift off the cover.
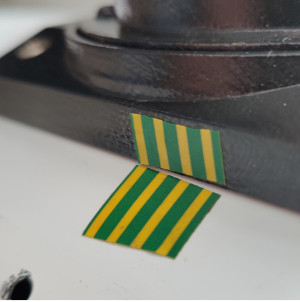
With the OTA horizontal, loosen, in turn, the four thumbscrews that hold the spider and secondary mirror, Carefully remove these and place them somewhere safe.
Use tape to make the position of the focuser. Remove the four bolts, nuts and lift off the focuser.
Cleaning Procedure
Wash your hands to ensure they are clean and soft. Ensure your nails are short.
Add a small drop of washing-up detergent to the bowl and pour in warm water. Agitating the water will ensure that the detergent is dissipated.
Hold the spider and dip and swirl the secondary mirror in warm water. Lift out and rinse under cold tap water. If the mirror is clean, pour distilled water over the mirror to remove any tap water. If the mirror cannot be cleaned by dipping it in the soap solution, use the moist tips of your index and forefinger to gently stroke (not rub) across any marks. Your fingertips will confirm that you using the lightest touch. Rinse the mirror under cold water and remove the tap water with distilled water.
Use a hand drier on the low heat setting to evaporate water droplets.
Place the spider and secondary mirror somewhere safe.
Change the warm water in the bowl and add another drop of soap solution.
Place the primary mirror in the bowl and repeat the dip and swirl procedure. Use the same fingertip method to remove any marks, repeating the cold rinse to check the mirror is clean. You may wish to change the water, soap solution between washes. Repeat as necessary and finish by pouring distilled water over the mirror to remove any tap water.
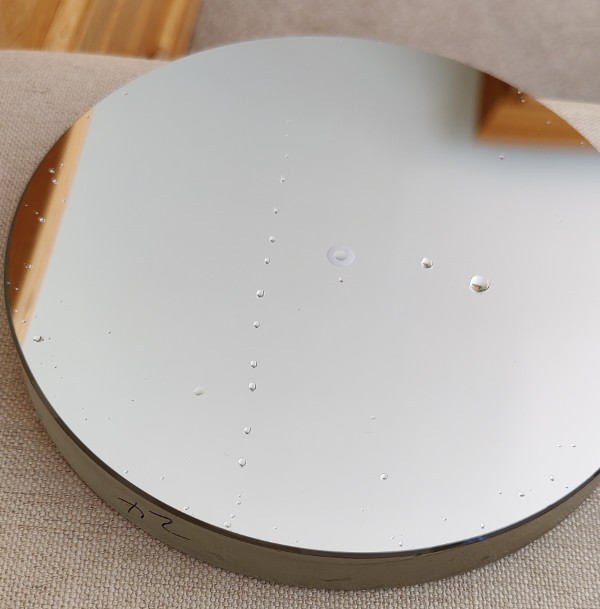
Use a hand drier on the low heat setting to evaporate water droplets.
Refitting
Without touching the surface, place the mirror (shiny side up) onto the plastic ring and loosely refit the clips and pair of screws.
It is important to tighten the clips just enough to secure the mirror without pressing it down. Therefore ensure there is a gap (the thickness of thin card) between the mirror and the clip. Check the mirror is secure in the mount.
Refit the primary mirror and mount onto the OTA. The tube will flex and the mount will be a fit tight so ensure the mirror is square to the tube with the markers. A small bradawl or screwdriver can be used to open the tube just enough to allow the mirror to fit and also to ensure the screw holes and threads are lined up.
Refit the outer screws.
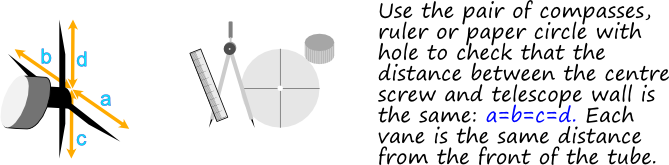
Refit the spider and secondary mirror. Use a pair compasses, ruler or circle of paper to ensure that the vanes are equal in length.
Refit the plastic surround and outer screws.